
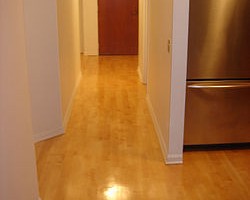

 Need I tell you that the floor is the largest feature in your home and that if it is shabby and unpolished, no matter how good your home looks, it will not have that chic appeal? As a DIY enthusiast, you will certainly want to know how to sand a timber floor so that you can do it on your free time. It is not too hard!
The floor handles a lot of foot traffic every day! Thus, with time, it is bound to show some wear and tear, and when the floor polish starts to wear off, it means you may have to give the floor a work over soon.
Why learn how to sand a timber floor?
Why bother about how to sand a timber floor? Firstly, you will save money because technicians can really be costly. Secondly, you can do it in your own free time, no hurry at all. Thirdly, you will enjoy the satisfaction that comes with knowing that yes, I did this on my own. DIY timber floor sanding rocks!
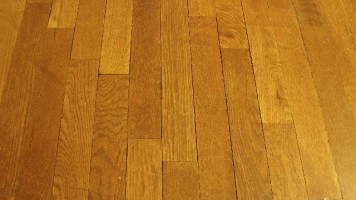
Wooden Floors are majorly sanded to repair damage, change color, preservation of the beauty of the floor after removal of the carpet and to change the finishing sheen. The main reason however is to give beauty to this renewable resource instead of waiting to do an entire replacement.
What will you need?
- Electric floor sander – Don’t buy, just hire
- Floor polish/varnish
- A brush with synthetic bristles or any other one if that is too expensive for you
- Floor mop and bucket with water
- safety goggles, dust mask
Preparation for how to sand a timber floor
Make your floor ready for sanding. Move around the whole area intended for sanding and check to ensure there are no protruding nails to avoid damaging the floor sander. All nails above the surface should be knocked in with a hammer until they sink a bit below the surface. Move your hands lightly of the floor to check for nails.
Sand paper belt installation on the drum of the sander
You cannot know how to sand a timber floor without knowing how to fix the equipment. Carefully, lay the drum sander on its side and slide the sandpaper on by lifting the cover of the drum and slide.It can a bit hard to install when the sandpaper is tight. In case this happens, wipe some fine sawdust on the inside of the belt to help it slide on. In cases where you need to do a lot of sanding, start with a rough sandpaper and use a lighter grit for a slightly damaged floor.
Start the sanding with a drum sander
Close the doors first so that dust will not escape to the other rooms. With the drum-head is sitting on the floor, pull the lever to drop the drum-head on the floor. For best results push the drum sander forward along the grains preferably, each row at a time. Let your movements be gradual, at an even pace for an even finish on the floor. After each row push down the lever to lift the drum from the floor. Reposition of the sander, start again on the next row.
Sand the edges with an edging sander
To get closer to the skirting boards, use an edging sander because it can access some areas the drum sander can’t reach. You will need a finer grit paper than the one used on the drum sander because an edging sander uses a disc that sands across the grain.
Sand the tight corners by hand with sandpaper.
When done, mop the floor to get rid of the dust, give it some time to dry and then apply the first coat of floor varnish, and a second one if necessary. Don’t forget to ask our Melbourne floor sanding experts if you get stuck!